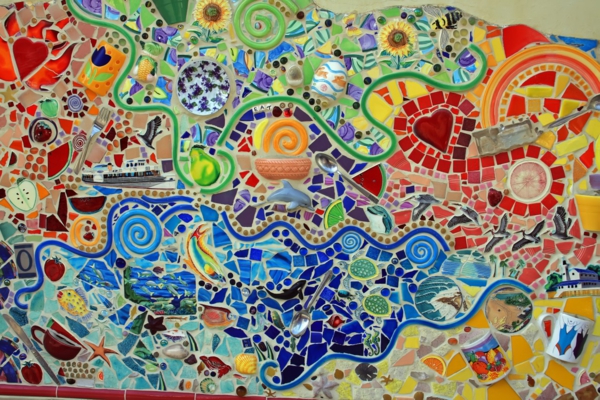
Mosaics are one of the oldest forms of art in the world, and have been used to decorate walls and furniture from as far back as Ancient Greece and Rome. Using small tiles to create images and larger patterns is a relatively simple idea but it is something that can create beautifully intricate pieces that truly are spectacular. The best part about mosaics is that it is a skill that anyone can pick up: you don’t need to have the painting skills of Picasso to create something truly beautiful and unique with mosaics. All you need is a bit of time and a lot of patience.
If you really want to create your own mosaics for art, for furniture, for your bathroom walls or even just for fun then here is a quick and simple guide to ‘do-it-yourself mosaics’.

1. Pick a pattern
If you have never created a mosaic before then it might be best to stick to something really simple like a flower design. However if you’re feeling adventurous then there is nothing stopping you from going really intricate with your mosaics – you can create anything from faces to landscape scenes.
It is best to have several copies of your pattern, and it is really handy to have a copy that is blow up to the exact proportional size as the mosaic you aim to create. That way you can use it as a guide when laying down your tiles.
2. Pick your materials
The fancy word for mosaic materials is your terrasse, but that doesn’t mean you need to use fancy materials to make a mosaic. Most mosaics are made from ceramics, but you can also include more crazy things like glass or beads in your mosaic – especially to help create specific details like (for example) an eye. You can buy terrasse pre-packaged for the best quality materials, but that can be expensive and sometimes inadequate if you plan on creating a large mosaic. Instead you might consider smashing up your own ceramics to create the variety of shapes and sizes you need.
Look at your design and start figuring out what kind of shapes you need. If your design involves a lot of curves for example you may want to shape a lot of curved ceramics using tile nippers. Don’t get too hung up on having all the right shapes though: jagged edges and imperfections are what make mosaics look cool.
3. Create your mosaic
The easiest way to create a mosaic is to apply adhesive directly to the back of the tiles as you place them down. However this does mean that you cannot change your mind once you’ve placed a tile, so make sure you’re certain that your piece fits the design before adding it in. Try keep the adhesive from getting on the front of the tiles because it is difficult (read: impossible) to remove once dry and will spoil the look of your mosaic.
4. Get grouting
Once your design is done and the adhesive is dry, then it is time to grout. Grouting is scary because it always looks like you’re ruining your mosaic. However once you’ve got your ground into all the grooves, it’s easy to wipe of with a cloth. Then leave your mosaic to dry out completely.
Et volia! You now have your own really cool mosaic!
By author Richard Orban, on behalf of DTW Ceramics. DTW Ceramics is one of the biggest bathroom tiles providers in the UK. Follow Richard’s occasional rants on twitter!

