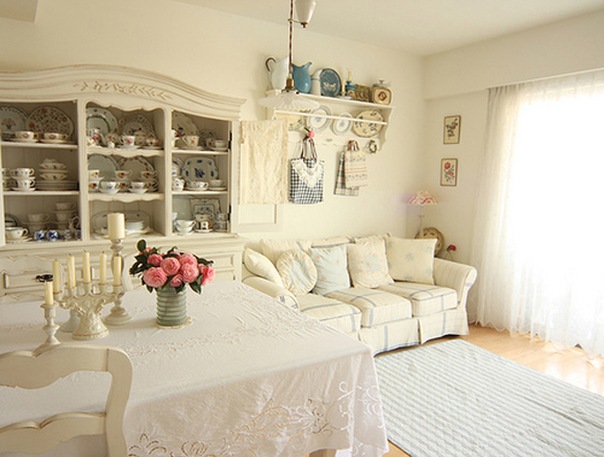
Have you just moved into a new house? Or do you feel like your house needs a good revamp? We all know when it comes to decorating it is important to get quality over quantity, it is always worth spending that little bit extra so that you know that what you are buying is going to last. Saying this, it is always handy to look around before settling on one company. Search the internet, talk to people, get suggestions.

Shabby chic is the new sophisticated; forget perfection and consider quirkiness. Shabby chic can give a home that traditional look yet still remaining stylish. Creating a worn look, your furniture can have character and have something a little different about it. It’s easy to do some D.I.Y, get out in your garden and start ageing furniture of your choice. It works best on furniture such as:
- Wardrobes
- Beds
- Bedside Tables
- Coffee Tables
- Chairs
- Door Frames
- Floor Board
- Shelving (basically anything that is wooden in your home).
It’s not that hard to achieve either, all you need is a little bit of imagination and good old fashion elbow grease.
Follow these easy step by step guides to create imperfect and quirky furniture:
- Cloth (damp)
- Cork Sanding block
- Sand Paper (80 Grit or so)
- Any Size Paintbrush
- White Paint (for the undercoat) and Coloured Paint (for the topcoat).
- Clear drying all-purpose gloss spray
These items are as cheap as chips to buy at any hardware store!
- First things first simply clean and wipe down the furniture to remove any dirt. Sand away any varnish that is on the surface of the furniture, to save your hands wrap it around a block of some sort. Re-wipe again once you’ve finished removing any dust.
- Apply a base coat I would recommend using white as it will make your top coat more stand out. You could get creative and go for a two toned effect (as when you sand back your topcoat later, some of the undercoat will be visible).
- Wait for the undercoat to dry, sand it back. Make sure to pay attention to any detailed areas. For example you may have to sand more vigorously on the lower part of the legs, on a genuinely aged piece of furniture this is one of the areas that would be most worn down.
- Apply your topcoat of paint. Once it has dried, repeat step 3.
Basically any areas that you want to look more worn just sand extra hard! Don’t be afraid to experiment a little! If you prefer it to look messed up, just paint over and re-sand until it looks perfect.
Remember though if you don’t have the time to do this yourself there are plenty companies out there that offer rustic furniture for a decent price.
Have you just moved into a new house? Or do you feel like your house needs a good revamp? We all know when it comes to decorating it is important to get quality over quantity, it is always worth spending that little bit extra so that you know that what you are buying is going to last. Saying this, it is always handy to look around before settling on one company. Search the internet, talk to people, get suggestions.
Shabby chic is the new sophisticated; forget perfection and consider quirkiness. Shabby chic can give a home that traditional look yet still remaining stylish. Creating a worn look, your furniture can have character and have something a little different about it. It’s easy to do some D.I.Y, get out in your garden and start ageing furniture of your choice. It works best on furniture such as:
- Wardrobes
- Beds
- Bedside Tables
- Coffee Tables
- Chairs
- Door Frames
- Floor Board
- Shelving (basically anything that is wooden in your home).
It’s not that hard to achieve either, all you need is a little bit of imagination and good old fashion elbow grease.
Follow these easy step by step guides to create imperfect and quirky furniture:
- Cloth (damp)
- Cork Sanding block
- Sand Paper (80 Grit or so)
- Any Size Paintbrush
- White Paint (for the undercoat) and Coloured Paint (for the topcoat).
- Clear drying all-purpose gloss spray
These items are as cheap as chips to buy at any hardware store!
- First things first simply clean and wipe down the furniture to remove any dirt. Sand away any varnish that is on the surface of the furniture, to save your hands wrap it around a block of some sort. Re-wipe again once you’ve finished removing any dust.
- Apply a base coat I would recommend using white as it will make your top coat more stand out. You could get creative and go for a two toned effect (as when you sand back your topcoat later, some of the undercoat will be visible).
- Wait for the undercoat to dry, sand it back. Make sure to pay attention to any detailed areas. For example you may have to sand more vigorously on the lower part of the legs, on a genuinely aged piece of furniture this is one of the areas that would be most worn down.
- Apply your topcoat of paint. Once it has dried, repeat step 3.
Basically any areas that you want to look more worn just sand extra hard! Don’t be afraid to experiment a little! If you prefer it to look messed up, just paint over and re-sand until it looks perfect.
Remember though if you don’t have the time to do this yourself there are many professional designers of rustic furniture who have done all the hard work for you!
By Sarah McDowell
Sarah is a Junior Digital Marketing Consultant at FDC

